Step-by-Step Tutorial: Creating Your First Light Painting Photo
Light painting is one of those photography techniques that looks impossibly complex but is surprisingly accessible once you understand a few fundamentals. With a camera, a tripod, and a flashlight you already own, you can create images that look like they belong in a gallery. This guide walks you through everything from gear to camera settings to your first actual shot.
What Is Light Painting Photography?
Light painting is a long exposure photography technique where you use a moving light source to "draw" or "paint" in the air while the camera's shutter stays open. The camera records the light trail as a continuous streak, creating shapes, patterns, or illuminated scenes that are invisible to the naked eye.
The core mechanic is simple: in a dark room or outdoor location at night, you open the shutter for an extended period — typically 10 to 30 seconds — and move a light source through the frame. The sensor captures every photon that lands on it during that window, building up the image over time rather than freezing a single moment.
For a first session, expect imperfect results. That's not a problem — it's the process. Most photographers produce something genuinely interesting within their first three or four attempts, even with zero prior experience.
Gear You Need Before You Start
You need four things to start light painting: a camera with manual mode, a tripod, a way to trigger the shutter without touching the camera, and a light source. That's it.
- Camera with manual mode — Any DSLR, mirrorless camera, or even a higher-end compact camera with full manual control will work. You don't need expensive equipment.
- Tripod — This is non-negotiable. During a 15-second exposure, even the slightest camera movement turns your carefully drawn shapes into a blurry mess. A basic, affordable tripod does the job perfectly well.
- Remote shutter release or self-timer — Pressing the shutter button by hand introduces vibration. Use a wired or wireless remote shutter release, or set your camera's built-in 2-second timer to create a buffer between your touch and the exposure.
- Light source — A standard LED flashlight is the best starting point. It's bright, directional, and easy to control. Other beginner-friendly options include glow sticks, LED wands, and even a lit smartphone screen.
Steel wool is a popular light source you'll see in dramatic photos online, but it involves real fire and safety risks. Save that for later sessions once you're comfortable with the basics.
Camera Settings for Light Painting (The Right Starting Point)
Start with these settings and adjust from there: ISO 100–200, aperture f/8–f/11, and shutter speed 10–20 seconds. This combination gives you a clean, low-noise image with enough depth of field and time to move your light source through the frame.
Shutter Speed
A shutter speed of 10 to 30 seconds is the standard working range for light painting. Shorter exposures give you less time to draw; longer ones allow more complex patterns but also risk capturing unwanted ambient light. Start at 15 seconds and see how much you can comfortably complete.
If you want full control — especially for complex compositions — switch to Bulb mode. In Bulb mode, the shutter stays open for as long as you hold the remote trigger, closing only when you release it. This is ideal once you're comfortable with the basics.
Aperture
The f/8 to f/11 range keeps most of the scene in sharp focus without requiring extreme ISO compensation. Avoid wide apertures like f/1.8 — they let in too much light and make precise exposure control much harder in dark environments.
ISO and Focus
Keep ISO as low as your camera allows — typically ISO 100 or 200. Low ISO settings minimize digital noise, which becomes very visible in the dark areas of long exposure shots. As for focus, autofocus struggles in the dark. Switch to manual focus, use a flashlight to illuminate your subject briefly, lock focus, then turn the lights off before you shoot.
File Format
Shoot in RAW format if your camera supports it. RAW files preserve far more tonal information than JPEGs, giving you much greater flexibility when adjusting exposure, white balance, and noise in post-processing. For light painting, where exposure can be tricky to nail perfectly in-camera, that flexibility is genuinely useful.
Choosing Your Environment and Light Source
The best environment for light painting is a space where you can control the light completely — ideally a room you can make fully dark, or an outdoor location well away from streetlights after sunset.
Indoors, a bedroom or garage with the lights off and curtains closed works well for a first session. Outdoors, parks, fields, or parking lots at night offer more space for larger patterns. The key test: stand in your chosen location, let your eyes adjust for 60 seconds, and see whether any background light is bright enough to wash out the frame during a 15-second exposure. If it is, find a darker spot or wait until later in the evening.
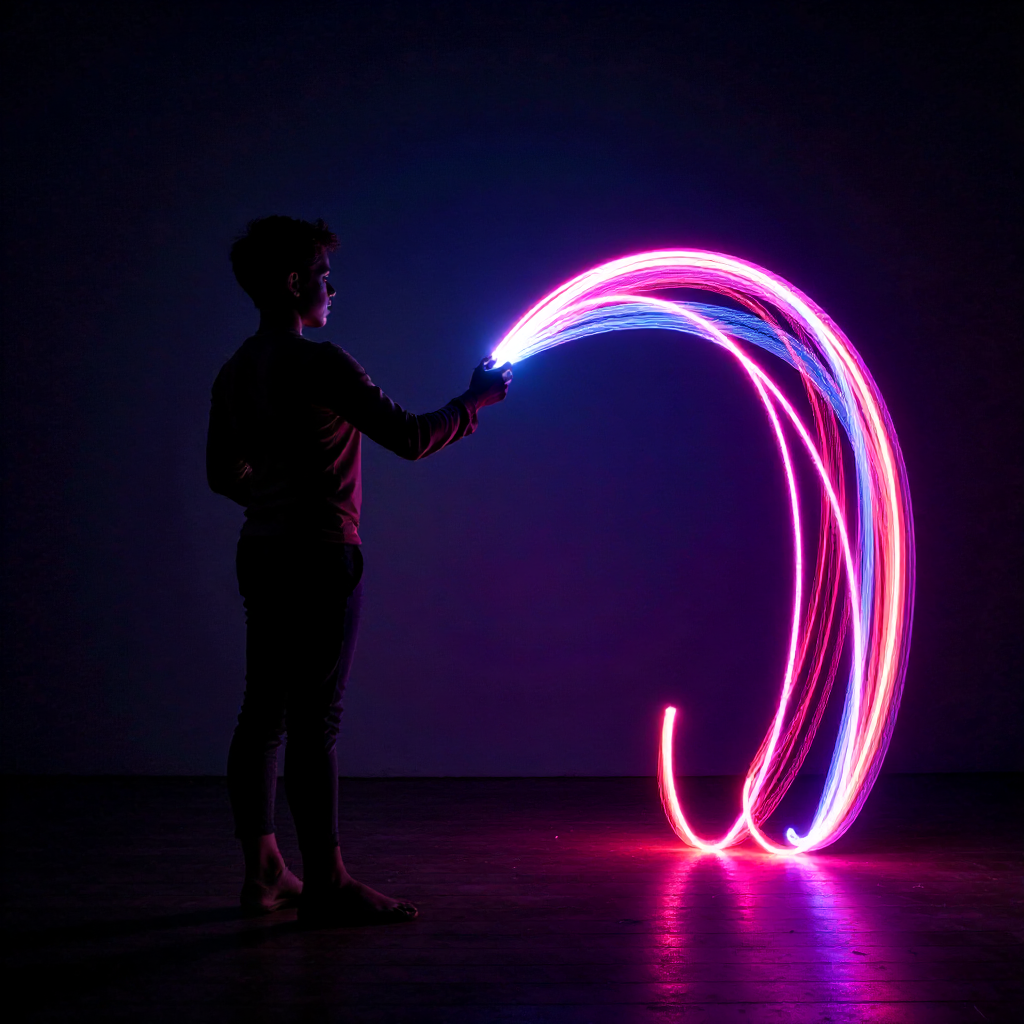
For your first session, stick to a single, handheld LED flashlight. It gives you precise control, a focused beam, and consistent brightness. Glow sticks are great for soft, diffused color but harder to use for precise shapes. LED wands designed for light painting photography are excellent tools once you decide to invest further — they produce clean, even lines and often come in multiple colors.
Your First Light Painting: A Step-by-Step Walkthrough
Follow these steps in order and you'll have a completed light painting image within your first 20 minutes of shooting.
- Set up your tripod and mount the camera securely. Point it at the area where you plan to move the light. Make sure the frame is composed the way you want — use a flashlight to briefly illuminate the scene while you adjust.
- Set your camera to manual mode and dial in your starting settings: ISO 100, f/8, 15-second shutter speed.
- Focus manually. Shine your flashlight at the spot where you'll be standing or working, autofocus on it, then switch the lens to manual focus so the setting locks in place.
- Turn off all lights in the room or wait for your outdoor location to settle into darkness.
- Trigger the shutter using your remote release or 2-second self-timer. Step into position immediately after.
- Move your light source through the frame in whatever pattern you've planned. Keep the light pointed toward the camera lens for maximum brightness. Move at a steady pace — too fast and lines look thin and faint; too slow and they bloom into wide, overexposed streaks.
- Step out of frame or hold still and turn the flashlight off before the shutter closes. If you stay in the frame while lit, you'll appear as a ghost image.
- Review the image on your camera's LCD. Check exposure (not too bright, not too dark) and adjust shutter speed or aperture accordingly. Repeat.
The gap between your first attempt and a genuinely good image is usually just two or three iterations of step 8.
Common Mistakes and How to Fix Them
Every beginner makes the same handful of mistakes in their first light painting session. Knowing what they are ahead of time cuts your frustration significantly.
Overexposed or Washed-Out Images
This happens when too much light hits the sensor — either because the shutter was open too long, the aperture was too wide, or the ISO was set too high. Fix it by narrowing the aperture to f/11, lowering ISO to 100, or reducing shutter speed. If you're shooting in a room that isn't fully dark, even small ambient light sources (a clock display, a power strip LED) accumulate over 15 seconds.
Blurry Light Trails
If the light trails themselves look blurry or doubled, the camera moved during the exposure. This almost always means the tripod wasn't locked down properly, or you bumped the camera when pressing the shutter button. Use a remote shutter release or the self-timer — pressing the button by hand is enough to introduce vibration on a long exposure.
Appearing as a Ghost in the Frame
If you're visible in the final image as a semi-transparent figure, you were standing in the lit portion of the frame for too long. The fix: wear dark clothing, move constantly so you don't register strongly on the sensor, or simply step out of frame when you're not actively painting. In a truly dark environment, the camera won't record you if you're not illuminated.
Out-of-Focus Light Trails
This usually means autofocus was active and hunting in the dark, or the manual focus was set incorrectly. Always set focus before the lights go out, then lock it. A quick check: take a test shot with the room lights on to confirm sharpness before starting.
Simple Ideas to Try on Your First Session
Knowing what to draw before the shutter opens makes the experience much less chaotic. Here are four patterns that are achievable in a first session and produce satisfying results.
- Circle or spiral — Stand at arm's length from the camera's focal point and swing the flashlight in a steady circular motion. This is the classic light painting shape and the easiest to control.
- Your name or a word — Write letters in the air as if using a pen, but mirror them left-to-right so they read correctly in the final image. Practice the motion a few times in the light before shooting.
- Zigzag or wave pattern — Move the flashlight in a continuous S-curve or zigzag across the frame. This works especially well when you vary your walking speed to create thicker and thinner sections of the line.
- Orb — Hold the flashlight at the end of a string, stand in one spot, and swing it in a circular arc around your body. The camera captures a near-perfect glowing sphere. It takes a couple of attempts to get the timing right, but the result looks spectacular.
Keep your first session focused on one or two of these. Building confidence with simple shapes gives you the spatial awareness and timing instincts that make more complex compositions possible later.
Frequently Asked Questions
What camera do I need to start light painting?
Any camera with a full manual mode works — including entry-level DSLRs and mirrorless cameras. The key requirement is the ability to set a specific shutter speed (or use Bulb mode), control aperture, and adjust ISO independently.
Can I do light painting with a smartphone?
Yes, with limitations. Some smartphones have a dedicated "long exposure" or "pro" mode that allows shutter speeds of 10–30 seconds. Results are generally noisier than a dedicated camera, but the technique is identical. You'll still need a tripod and a way to trigger the shutter without touching the phone.
How dark does the room or location need to be?
Dark enough that no light source other than your painting tool is visible during the exposure. A good rule of thumb: if you can comfortably read text without a flashlight, it's probably too bright for clean light painting results.
Why are my light painting photos coming out blurry?
Camera movement during the exposure is the most common cause. Confirm your tripod is stable, use a remote shutter release or self-timer, and make sure you're not accidentally nudging the tripod while you move around during the exposure.
Do I need to edit my light painting photos afterward?
Basic adjustments — exposure, contrast, and noise reduction — are helpful and often necessary, especially if you shot in RAW format. Editing software like Adobe Lightroom or free alternatives like RawTherapee make these adjustments straightforward. That said, a well-exposed shot with good in-camera settings needs minimal post-processing to look finished.