Mastering Long Exposure for Stunning Light Art: A Complete Practical Guide
Long exposure light art sits at the intersection of photography and performance — part technical discipline, part improvised dance in the dark. The images look like they required hours of post-processing, but the truth is more satisfying: everything happens in a single camera exposure, in real time, with light as your brush.
What Is Long Exposure Light Art?
Long exposure light art (also called light painting) is a photographic technique where a slow shutter speed — typically anywhere from 2 seconds to several minutes — captures moving light sources as continuous trails, shapes, or painted strokes across the frame. The camera records the cumulative path of every photon that hits the sensor during that open shutter window.
Unlike conventional photography, where you freeze a moment, light painting builds an image over time. You might spend 20 seconds waving an LED wand through the air, and the camera records the entire arc as a glowing ribbon of color. The dark background stays dark. The light writes itself onto the image.
This guide covers everything you need to go from zero to producing clean, intentional light art — gear selection, camera settings, light source choices, composition strategy, and how to diagnose problems between shots without touching editing software.
Essential Gear Before You Start
You need four things to begin: a camera with full manual control, a sturdy tripod, a remote shutter release, and at least one light source. That's the non-negotiable baseline.
Any camera that offers manual mode and bulb mode will work — mirrorless, DSLR, or even some advanced compact cameras. Full-frame sensors have advantages in low-light noise performance, but crop-sensor cameras are perfectly capable of producing excellent light art, especially when you keep ISO low (more on that shortly).
The tripod is critical. Any camera movement during a 15-second exposure destroys the image. A cheap, lightweight tripod that wobbles in a breeze will cost you shots. Look for something with a center column that locks firmly and legs that don't flex. If you're shooting outdoors, consider the weight of your camera body when choosing a tripod — an unbalanced rig is a liability.
A remote shutter release — either a wired cable release or a wireless trigger — prevents the vibration caused by pressing the shutter button manually. Some cameras support smartphone apps for remote triggering, which works fine for exposures longer than a few seconds. For bulb mode shots, a locking cable release is the most reliable option because it holds the shutter open without you touching the camera.
Camera Settings for Long Exposure Light Painting
Start here: ISO 100, aperture f/8, shutter speed 15–30 seconds. This baseline works for most dark environments and gives you room to adjust in either direction based on your light source brightness and ambient conditions.
Shutter Speed
Shutter speed controls how long you have to paint. A 15-second exposure gives you 15 seconds of movement. A 60-second exposure gives you more time but also accumulates more ambient light, which can wash out your background. Start shorter and extend only when you need more time to complete a complex composition.
For exposures longer than 30 seconds, switch to bulb mode — a setting that keeps the shutter open for as long as you hold the trigger (or lock it). Bulb mode is essential for elaborate light paintings that require a minute or more to execute.
Aperture
Aperture affects both depth of field and how much ambient light enters the frame. f/8 is a reliable starting point — it gives reasonable depth of field and controls light intake without being so restrictive that your light sources appear dim. If your light trails look faint, open up to f/5.6. If the background is bleeding in too much ambient light, stop down to f/11.
ISO and White Balance
Keep ISO as low as your camera allows — ISO 100 or 200 — to minimize sensor noise, which becomes visible in dark areas during long exposures. Raising ISO to compensate for dim light sources is tempting but counterproductive; it's better to use a brighter light tool or open the aperture slightly.
Set white balance manually rather than leaving it on auto. Auto white balance can shift between shots, making color consistency impossible to predict. Daylight (5500K) or Tungsten (3200K) both work well depending on the color temperature of your light source. Pick one and stick with it for a session.
Choosing and Using Your Light Sources
The light source you use determines the character of your image more than any camera setting. Different tools produce radically different visual results.
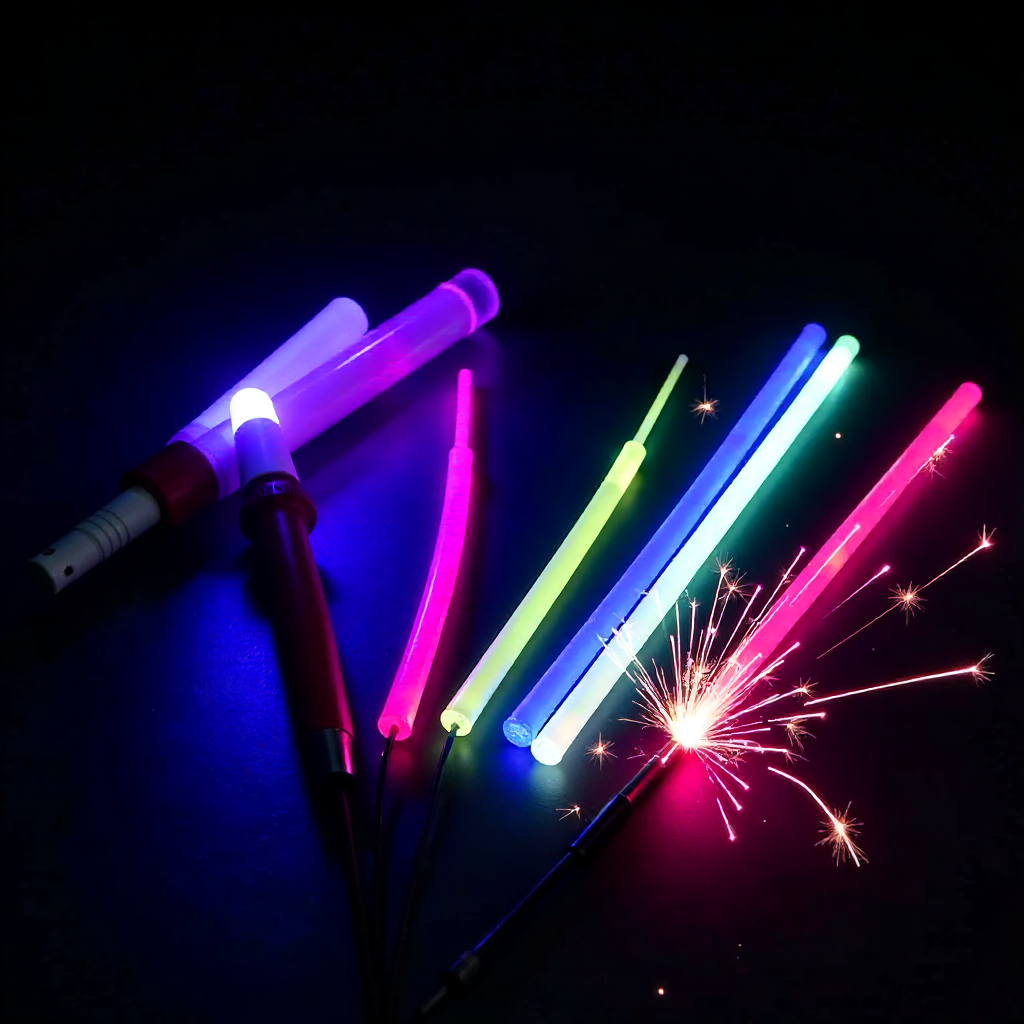
LED wands and flashlights are the most beginner-friendly option. They're controllable, consistent, and available in a wide range of colors. A simple LED torch with a colored gel taped over the end can produce clean, bright strokes. Wands with built-in color-changing modes let you shift hues mid-exposure for gradient effects.
Glow sticks are low-cost and produce soft, diffused light — good for orbs and sweeping arcs, less useful for precise line work. Their brightness fades over the exposure duration, which can create an unintended gradient effect (sometimes that's actually desirable).
Fiber optic whips create a spray of fine light points — almost like painting with a sparkle brush. They're excellent for texture and atmosphere but harder to control with precision.
Steel wool spinning deserves a separate mention because it involves real fire. When ignited and spun in a wire whisk on a long cord, burning steel wool sprays a cascade of orange sparks in a wide circle — one of the most dramatic light painting effects possible. It also requires genuine safety precautions: shoot on non-flammable surfaces (concrete, sand, rock), keep water nearby, wear eye protection, and never spin near dry grass or combustible materials. The visual payoff is spectacular, but this is not a technique to attempt carelessly.
Composing and Executing Your Light Art Shot
Composition in light painting happens before the shutter opens. Once the exposure starts, you're committed to the frame you've set up.
Before your first exposure, set the camera on the tripod and use a flashlight or your phone screen to light yourself (or your subject) briefly so you can focus manually and frame the shot. Switch the lens to manual focus after locking in, so autofocus doesn't hunt during the exposure. Mark your position on the ground with tape or a small object so you can return to the same spot between attempts.
In a completely dark or near-dark environment, the camera records only what emits or reflects light during the open shutter. This is the fundamental principle that makes light painting work — the dark background doesn't accumulate exposure the way a lit scene would. Any ambient light (street lights, windows, moonlight) will register, so controlling your shooting environment is as important as controlling your camera settings.
Plan your movement before you shoot. Walk through the motion without triggering the camera first. Think about where you'll start, the path your light will travel, and where you'll end. Deliberate, fluid movement produces cleaner strokes than improvised waving. For orbs — circular light shapes — practice the wrist motion that creates a consistent arc. It takes repetition to get smooth.
If you want to stay invisible in the image, wear dark clothing and keep moving throughout the exposure. A stationary person in dark clothes will still accumulate enough reflected light to appear as a ghost silhouette in longer exposures.
Common Mistakes and How to Fix Them
Most problems in light painting are predictable, and most can be fixed between shots by adjusting one variable at a time.
Overexposure
Overexposure happens when too much light — ambient or from your light source — reaches the sensor. The image looks washed out, highlights are blown, and light trails lose their color. Fix it by stopping down the aperture (f/11 or f/16), reducing shutter speed, or shooting in a darker location. People often forget that even a distant streetlight can overexpose a 60-second exposure.
Visible Artist Silhouette
If you appear as a ghostly outline in your own image, you've either stayed too still in one spot, worn reflective clothing, or the ambient light is bright enough to expose your body. Wear matte black clothing, keep moving, and reduce ambient light in the environment. You can also position yourself outside the frame entirely and reach your light source into the shot.
Inconsistent or Shaky Light Strokes
Shaky light trails usually mean unsteady hand movement, not a camera problem. Slow down. Deliberate, even movement produces clean lines. Practice the motion multiple times before triggering the shutter. For precise geometric shapes, use a physical guide — a string tied to a fixed point creates a perfect circle when you keep tension on it while moving.
Unwanted Color Casts
A green or orange tint across the whole image usually means your manual white balance doesn't match the ambient light in the room. If you're shooting indoors under fluorescent lights, those lights will color the background even if they seem dim. Either eliminate the ambient source or adjust white balance to compensate.
Reviewing and Refining Your Results In-Camera
The fastest way to improve your light painting is to review each shot critically on the LCD screen immediately after the exposure — before you move anything.
Check the histogram first, not the image preview. The LCD screen's brightness can be misleading, especially in a dark shooting environment where your eyes are adapted. A histogram that's piled up against the right wall means overexposure. A histogram with a large gap on the right means you have room to add more light or extend the exposure.
After confirming exposure, zoom into the LCD at 100% to check light trail sharpness and consistency. Look for where the strokes wobbled, where they're too bright or too dim, and whether the overall composition reads the way you intended. This review process — shoot, check histogram, zoom and inspect, adjust one variable, reshoot — is the core iteration loop that separates photographers who improve quickly from those who repeat the same mistakes.
Resist the urge to immediately reach for editing software to fix problems. If the exposure is wrong, fix the camera settings. If the light trail is sloppy, practice the motion. Light painting rewards in-camera problem-solving, and the skills you build by diagnosing issues on-location transfer directly to faster, better results on every future shoot.
Frequently Asked Questions
What shutter speed should I use for light painting?
Start between 15 and 30 seconds. This gives you enough time to complete most light painting movements while limiting ambient light accumulation. For complex compositions requiring more time, switch to bulb mode and extend the exposure as needed.
Do I need a full-frame camera for long exposure light art?
No. Crop-sensor cameras produce excellent light painting results, especially at ISO 100–200 where sensor noise is minimal. Full-frame sensors offer better high-ISO performance, but that advantage is largely irrelevant when you're keeping ISO low, which you should be.
How do I avoid appearing in my own light painting photo?
Wear matte black clothing, keep moving throughout the entire exposure, and avoid standing directly in front of any ambient light source. You can also position yourself outside the frame and extend only your arm and light source into the shot.
Can I do light painting indoors?
Yes, and indoors often gives you better control over ambient light than outdoor locations. Close blinds, turn off all room lights, and use a remote shutter release to trigger the camera from across the room. Basements and windowless rooms work particularly well.
What is bulb mode and when should I use it?
Bulb mode keeps the camera shutter open for as long as you hold (or lock) the shutter trigger, rather than limiting you to the camera's maximum preset shutter speed (typically 30 seconds). Use it whenever your light painting requires more than 30 seconds to complete — elaborate compositions, large-scale environmental paintings, or steel wool spinning sequences.
Light painting is one of the few photographic disciplines where practice sessions genuinely look like finished art from the first attempt. The learning curve is real, but the feedback loop is immediate — every shot tells you exactly what to change next. Start simple, iterate fast, and let the experiments accumulate into a body of work that couldn't exist any other way.